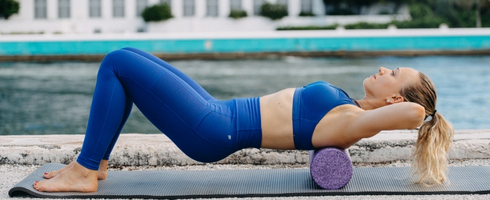
What is foam rolling?
Foam rolling (or self-myofascial release) is a kind of massage that uses various devices to manipulate the skin, myofascia, muscles, and tendons by direct compression.1
“Foam rolling” is more of a nickname for the technique that became popular amongst physical therapist, athletic trainers and fitness professionals. While foam rollers of different shapes are most commonly used for self-myofascial release, certain areas of a body require smaller instruments such as balls, massage sticks, etc.
Why do we need to foam roll?
Pressure produced by foam rolling creates mechanical and neurophysiological effects that help
- tissue relaxation
- local pain relief
- myofascial release
- increase range of motion
- reduce fluid retention (you may look less bloated, at least in a short term)
Put it simple, foam rolling helps to relax a tight muscle and release fascia. It’s different from stretching and, in fact, provides better results when used together with some stretching and mobilization techniques.
When should I foam roll?
- Warmup Foam rolling can be used as a part of your warmup. Your physical therapist or personal trainer usually gives you a list of specific foam rolling exercises based on assessment. When you are short on time, just do what’s on that list because it’s crucial to your PT session or workout. You can also do a whole body foam rolling routine (see below) that covers the most common trigger point areas that need a release before training.
- Post-workout recovery. It may be a good idea to foam roll after an intense workout session especially if you feel tightness in certain areas of your body.
- Recovery days’ routine. Foam rolling is a true TLC to your body! Recovery days are perfect for a whole body foam rolling routine along with some stretches and joint mobility exercises.
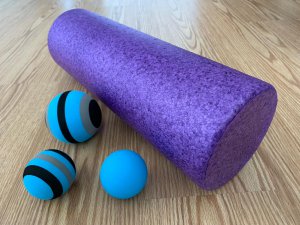
What kind of foam roller should I use?
If you are a beginner, then keep it simple! Just get a basic inexpensive foam roller that is:
- Medium or high density
- Non-textured
- 36-inch length is best; 18-inch will work fine if you need a more portable version
You’ll also need a massage ball for smaller areas of your body:
- tennis/golf/non-textured massage balls
- bigger massage ball (3,5 – 5-inch) will work better for hamstrings and adductors
Contraindications1
|
|
1 Cheatham SW, Stull KR. ROLLER MASSAGE: A COMMENTARY ON CLINICAL STANDARDS AND SURVEY OF PHYSICAL THERAPY PROFESSIONALS- PART 1. Int J Sports Phys Ther. 2018;13(4):763‐772.
Sample Foam Rolling Routine
1. Feet:
- AVOID rolling directly on a heel.
- Use a massage, tennis or golf ball.
- Roll front and back, then try moving the ball across your foot.
- Apply moderate amount of pressure on a ball. Some amount of pain is ok.
- Roll at least 30 sec. each foot.
- Hold a ball on trigger point 30 sec. or longer.
- If it pulses, throbs, numbs, or tingles find a new spot.
2. Calves (Gastrocnemius & Soleus)
- AVOID rolling directly under the knee and the achilles tendon.
- Apply moderate amount of pressure on a roller/ball. Some amount of pain is ok.
- Roll at least 30 sec. each leg.
- Hold the pressure on a trigger point for 30 sec. or longer.
- If it pulses, throbs, numbs, or tingles find a new spot.
3. Calves (Fibularis)
- AVOID rolling directly on the knee and the achilles tendon.
- Apply moderate amount of pressure on a roller. Some amount of pain is ok.
- Roll at least 30 sec. each leg.
- Hold the pressure on a trigger point for 30 sec. or longer.
- If it pulses, throbs, numbs, or tingles find a new spot.
4. Quads (Front of the Thigh)
- AVOID rolling directly on the knee.
- Apply moderate amount of pressure on a roller. Some amount of pain is ok.
- Roll at least 30 sec. each leg.
- Hold the pressure on a trigger point for 30 sec. or longer.
- If it pulses, throbs, numbs, or tingles find a new spot.
5. Hamstrings (Back of the Thigh)
- AVOID rolling directly under the knee.
- Apply moderate amount of pressure on a roller. Some amount of pain is ok.
- Roll at least 30 sec. each leg.
- Hold the pressure on a trigger point for 30 sec. or longer.
- If it pulses, throbs, numbs, or tingles find a new spot.
6. Adductors (Inner Thigh)
- Apply moderate amount of pressure on a ball. Some amount of pain is ok.
- Roll at least 30 sec. each leg.
- Hold the pressure on a trigger point for 30 sec. or longer.
- If it pulses, throbs, numbs, or tingles find a new spot.
7. TFL (Side & Front of the Thigh)
- Apply moderate amount of pressure on a roller. Some amount of pain is ok.
- Roll at least 30 sec. each leg.
- Hold the pressure on a trigger point for 30 sec. or longer.
- If it pulses, throbs, numbs, or tingles find a new spot.
8. Glutes (Butt)
- AVOID rolling directly on the sacrum.
- Roll ONE BUTTOCK AT A TIME.
- Apply moderate amount of pressure on a roller. Some amount of pain is ok.
- Roll at least 30 sec. each leg.
- Hold the pressure on a trigger point for 30 sec. or longer.
- If it pulses, throbs, numbs, or tingles find a new spot.
9. Mid Back (Thoracic Spine)
- AVOID rolling directly on the neck and lower back.
- Support the head with your hands.
- Apply moderate amount of pressure on a roller. Some amount of pain is ok.
- Roll at least 30 sec.
- Hold the pressure on a trigger point for 30 sec. or longer.
- If it pulses, throbs, numbs, or tingles find a new spot.
10. Lats and Teres Major
- Apply moderate amount of pressure on a roller. Some amount of pain is ok.
- Roll at least 30 sec. each side.
- Hold the pressure on a trigger point for 30 sec. or longer.
- If it pulses, throbs, numbs, or tingles find a new spot.